


Chocolate Peanut Butter Caramel Cookie Sandwiches
*This post was created in collaboration with Great Lakes Wellness. All words, images, and opinions are my own.
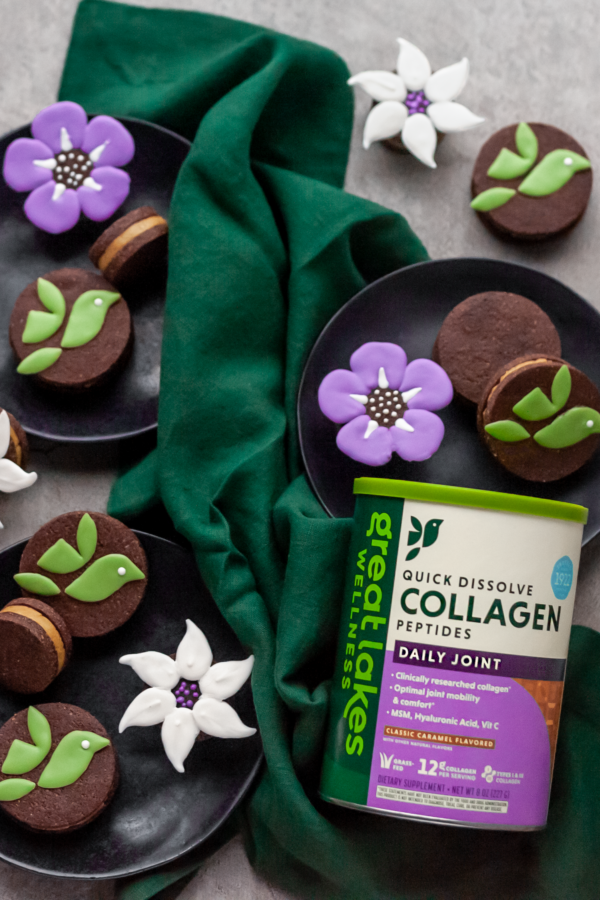
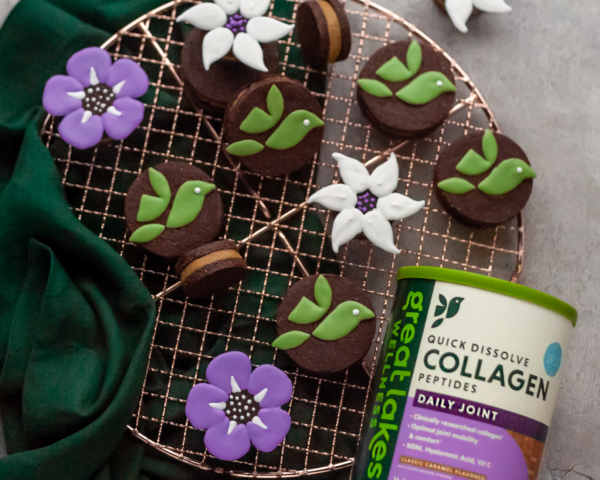
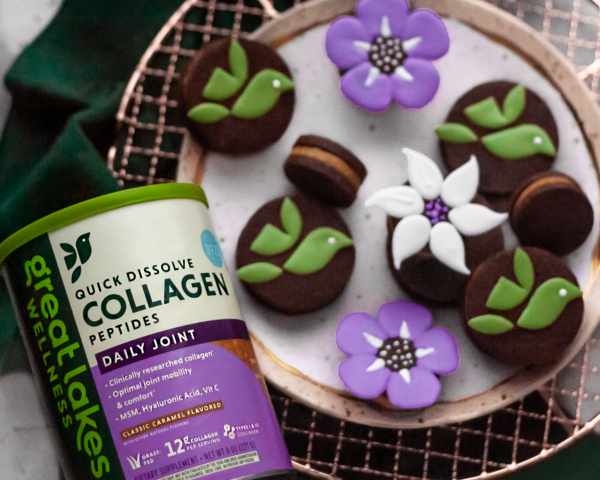
Aside from ice cream, cookies are my other dessert weakness :). Since I love to end each day with a little something sweet I’m always looking for ways to make my favorite treats a bit healthier (with less sugar, and added nutrition). So when my friends at Great Lake Wellness sent me their brand new Classic Caramel Collagen Peptides I knew exactly what I wanted to make!
The Caramel Collagen has the smooth, buttery flavor of a salted caramel candy, so I thought it would pair perfectly with velvety peanut butter and a rich and chocolatey cookie (you can’t beat a classic chocolate and peanut butter combination, in my opinion). Just like the collagen, the cookies and filling are all gluten and refined sugar- free (you can even make them keto by swapping the maple syrup with a monk fruit version). They are also crazy easy to make – no mixer required. The cookies soften as they set to the perfect chewy cookie consistency. But be warned, you may end up eating all of the filling before you even assemble the cookies as it’s quite addicting!
As a year-round trail runner, I also love that the Daily Joint Collagen Peptides have MSM, Hyaluronic Acid, and Vitamin C added for joint support. Any little bit of help I can get for my knees is definitely a win 🙂 (especially as I prep to run my favorite hilly park this winter). You can check out the entire Great Lakes Wellness Benefit-Led Collagen Line here, and scroll down to see how I turned their adorable new logo into decorations for these delicious cookie sandwiches below.
Ingredients: (makes 1 dozen 2.25″ cookie sandwiches)
Chocolate Shortbread Cookies:
Peanut Butter Caramel Filling: (makes about 1 cup)
Decorations:
Logo Template (print to fit within your cookie cutouts)
Green, white, and violet compound chocolate (also called melting wafers) or white chocolate chips and matcha powder and purple sweet potato powder (to naturally color)
Toothpicks
Wax paper
Directions:
- Preheat the oven to 350°F. Line a baking sheet with parchment paper.
- Add the flour, cacao powder and sea salt to a large mixing bowl and whisk to combine.
- In a separate bowl, combine the coconut oil, vanilla and maple syrup. Add the wet ingredients to the dry, and stir to combine.
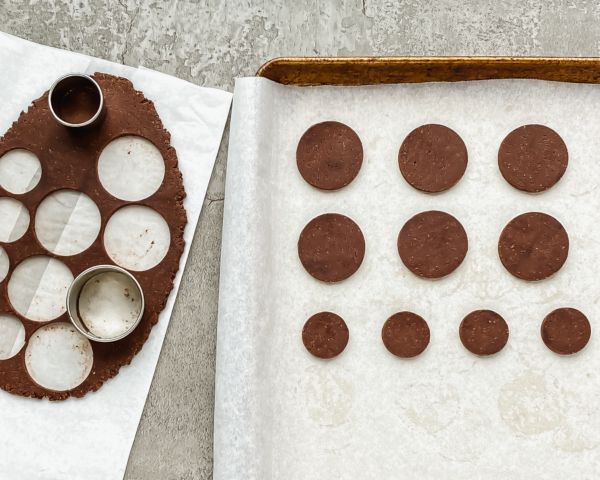
- Divide the dough in half and roll each half out to about 1/4″ thickness between 2 sheets of parchment paper. Transfer the dough to the refrigerator for 20 minutes.
- Once the dough has chilled you can use the cookie cutter to stamp out as many cookies as possible. Transfer each cutout to your prepared baking sheet. These cookies do not spread so you can place them close together on the tray. Re-roll any scraps and chill before cutting more out.
- Bake for about 8 minutes or until the edges of each cookie look firm and the middle is still just slightly soft (they may puff up a bit when baking, but they will flatten as they cool).
- Let the cookies cool for 5 minutes before transferring to a wire cooling rack to cool completely.
- While waiting for the cookies to cool you can make the filling. Place the entire jar of coconut butter into a mug full of hot water for at least 10 minutes to soften. Once melted, stir thoroughly (to mix the coconut oil in) and pour the melted coconut oil into a bowl. Use a spatula to stir in the natural peanut butter and vanilla. Once thoroughly combined add the Caramel Collagen. Taste, and add the maple syrup if you’d like to sweeten the filling more.
- Top 6 of your cooled cookies with a heaping 1/2 tablespoon filling (you can roll it into a ball first before pressing onto the cookies for a more even fill). Then add the top cookie and gently press together (I used 1 teaspoon for the smaller cookies). Transfer all of the cookie sandwiches to the refrigerator while working on the decorations.

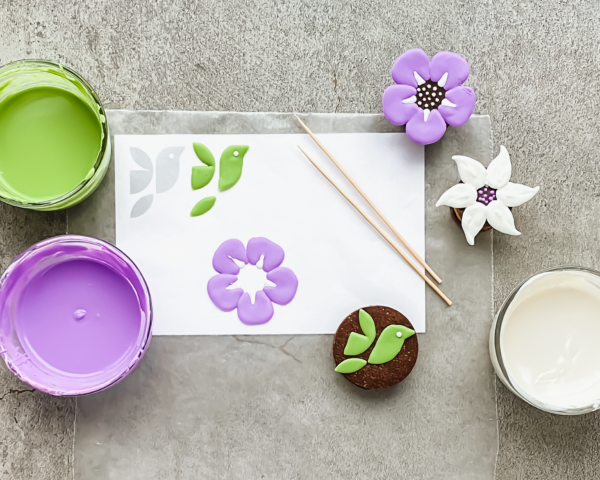
- Melt each color of compound chocolate in a microwave-safe bowl. Start with heating the chocolate for 1 minute at 50% power, stir, then decrease to 30-second intervals at 50% power (stirring after each interval, until smooth and completely melted).
- Place the logo template under a sheet of wax paper and use either a toothpick or small skewer to draw the designs onto the wax paper. Allow to set. You can also make flowers, using this same method. I just draw the design onto a sheet of paper first, as a guide or to make the flowers even simpler, you can use your toothpick to create the designs directly onto the smaller cookie sandwiches (create the petals with one color of chocolate and then add a dot of the other color in the center).
- Once all of the chocolate has set you can use a little more melted chocolate to transfer the pieces to the tops of your cookies. I added dots of melted chocolate to the middle of each of my smaller, flower cookies.
- Enjoy right away or cover and refrigerate to store for longer. Cookie sandwiches taste best at room temperature. Take them out about 20-30 minutes before eating, if refrigerating.
Please let me know if you try this tutorial, I would love to see your version :).


join the mailing list!
get recipes and other delicious tidbits sent to your inbox!


